PUMPKIN GROWING GUIDE
Tips to help you start your pumpkin plants from seed or seedling, pumpkin plant care, and a simple recipe for Roasted Pumpkin Seeds.
DOWNLOAD PRINT VERSION
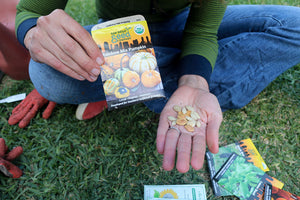
Sowing Pumpkin Seeds *Starting seeds indoors is not recommended.
What You Need
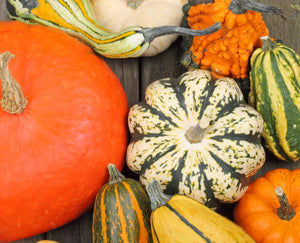
1. Seeds: Pumpkins grow in various sizes, shapes, colors, and textures and generally take at least three months until they're ready to harvest. Think of how you'd like to use your pumpkins, whether for carving, decor, or eating, and make sure to check your seed packet, which should list "days until maturity," to help you prepare.
2. A Sunny and Sprawling Location: When the weather is warm (consistently above 70 degrees F), find a sunny location for your pumpkin plants. If you have space, pumpkin vines can sprawl over a large area (ranging from 50-100 square feet). If you don't have that kind of room, don't worry. You can also plant pumpkins at your garden's edge and direct the vines along beds, paths, or even along the border of your lawn. (You can also get creative and grow vertically – see Page "Pumpkin Plant Care" below.)
3. Fertile and Well-draining Soil: Pumpkin plants thrive in nutrient-rich soil. Mix in some compost or worm castings (make your own or purchase some from your favorite local plant nursery) before you plant. Compost will also help create loose soil that quickly drains. Pumpkin plants that get too much water are prone to powdery mildew and root rot.
Sowing Pumpkin Seeds
What to Do
1. Since pumpkin variety spacing can vary, check recommendations on the seed packet.
2. Prepare small hills, roughly 2-3 feet in diameter, or the size of a pitcher's mound, that are at least four feet apart.
3. With a pencil, your pinky finger, or garden-appropriate tool, create 4-5 evenly (and packet recommended) spaced holes around each mound.
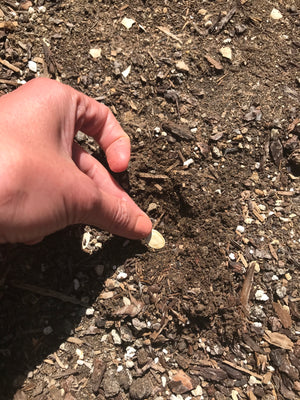
4. Sow one seed, about 1” deep, into each hole. After, gently cover each seed with soil.
5. Water the area with a spray bottle or gentle watering can (not a hose) to not wash away or displace newly planted seeds.
6. Since the key to seed germination is warmth and moisture, make sure to keep an eye on the area, keeping the soil damp until you see pumpkin sprouts.
7. Once sprouts emerge, only water every 2-4 days at the plant's base and not the leaves.
8. When plants are 2-3” tall, thin them out so that you are growing 2-3 per mound.

Planting Pumpkin Seedlings
Successful Transplanting
1. When the weather is warm (consistently above 70 degrees F), find the right location for these plants that need well-draining fertile soil, full sun, and room for vines to sprawl out (ranging from 50-100 square feet). If you don't have that kind of room, don't worry. You can also plant pumpkins at your garden's edge and direct the vines along beds, paths, or even along the border of your lawn.
2. Prepare small hills, roughly 2-3 feet in diameter or the size of a pitcher's mound, that are at least four feet apart.
3. Plan to plant 2-3 plants on each mound and dig holes that match seedling pot depth.
4. Add water into the hole that will be the new seedling's home. This boost of hydration helps the plant avoid going into transplant "shock" in its new location.
5. Holding onto the plant's base, slowly tip the seedling sideways and pull out the plant while gently squeezing the seedling pot. Pumpkin plant roots are very fragile and once the plant is removed from the pot, carefully hold the plant by supporting the root ball.
6. Gently place the pumpkin plant into its new home and try to keep bottom leaves from getting buried. Continue adding soil to the hole and gently lift leaves above the soil surface. Then gently press down on the ground at the base to secure the plant in place.
7. Give the little seedling a fair amount of hydration, always watering where the plant's base meets the soil. (Try not to get the leaves wet as pumpkin plants are prone to fungal diseases like powdery mildew. Drier leaves = a healthier plant!)
8. Monitor your seedling and water deeply at the plant's base every 2-4 days.
Companion Planting
Companion planting is the method of growing multiple crops together. If done right, the crops can both enhance and protect one another.
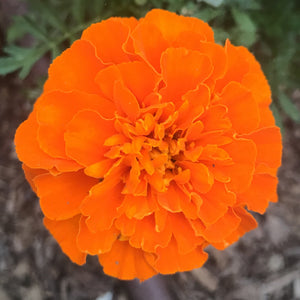
PumpkinPlant “Bros” (awesome companion crops): Squash, Beans, Corn, Dill, Lavender, Marigold Flowers, Sunflowers, and Nasturtium Flowers
PumpkinPlant “Foes” (crops to avoid): Potatoes, Beets, Onions
Pumpkin Plant Care
Support
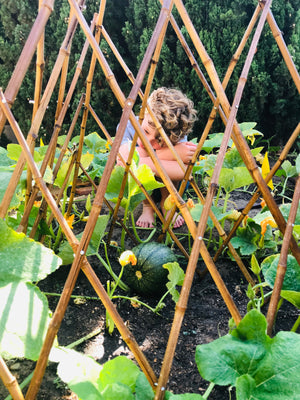
Most pumpkin varieties are vining plants that sprawl along and throughout your growing space. You can let them grow freely or direct the vines along garden areas, pathways, or any direction you choose. You can also get creative and train your vines vertically with sturdy trellises that help support the weight of stems, leaves, and heavy fruits. In addition to a strong trellis structure, you’ll need garden twine to attach vines and netting or even pantyhose to support the plump fruit. (Tip: position your trellis into the soil before inserting your seedling. This way, you won’t damage any of the roots, but rather the roots will grow around the structures.)
Hydration
Water these pumpkin plants daily (unless nature does it for you) and early in the morning. You also want to water at the base of the plant and not the leaves. These simple habits will help produce healthy, large fruit and prevent fungal diseases like powdery mildew and bacterial wilt.
Airflow
Good airflow is SUPER important. It prevents fungal disease while also helping leaves dry out, which increases the amount of moisture and nutrients absorbed through plant roots. To increase airflow, remove any dead leaves and train the pumpkin vines away or upward from one another.
Pest Control
One of the best ways to control pests is to create a protected environment. Companion planting with Dill attracts beneficial insects that will feast on some common pumpkin plant pests, like aphids, squash borers, and cucumber beetles.
Give 'em a Boost!
Compost is the best way to keep your pumpkin plants happy. Every two weeks, place some compost or worm castings around the base of each to provide the needed nutrition for healthy leaves, vines, and fruit. (You can make your own compost and worm castings or purchase bagged products from your favorite local plant nursery.)
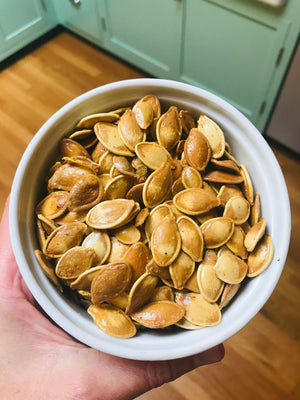
Roasted Pumpkin Seeds
Ingredients
2 Cups of Pumpkin Seeds
3 Tbsp of Butter (melted) or Olive Oil
Salt(to taste)
Directions
1. Remove your pumpkin seeds from inside the gourd by using a spoon or ice cream scoop.
2. Add the seeds to a colander and rinse away any of the pulp or fibrous strings.
3. Allow the seeds to dry as much as possible by blotting them with a towel or allowing them to sit out for a few hours.
4. Toss the seeds in a bowl with your Butter(or Olive Oil), Salt, and chosen seasonings.
5. On a cookie sheet, Roast the seeds at 350 degrees for 12-15 minutes, stirring them every 5 minutes to avoid them from sticking to the pan.
6. When the seeds are a golden brown, take them out of the oven and allow to cool slightly before you start to snack!
You can can also experiment with:
Experiment by adding Garlic Powder, Pepper, Paprika or other spices to give your seeds a unique flavor.

